2.3 Working with Accessible Media (video and audio)
| Site: | LaneOnline: M4 (mdev) |
| Course: | CDI M4 demo (Keene-ID Services) |
| Book: | 2.3 Working with Accessible Media (video and audio) |
| Printed by: | Guest user |
| Date: | Thursday, 29 January 2026, 9:52 PM |
Creating Accessible Video and Audio Overview
Creating accessible video and audio is key to whether a student can watch a video and learn the content you are providing as a learning tool. Captioning a video is not just for persons who are hard of hearing or deaf. Thinking in terms of universal design, captions can benefit all types of learners; people learning to read, non-native language speakers and deaf or hard of hearing individuals. Captioning can also improve comprehension of the material.
In this book, we will go over what is required to make video and audio content accessible. Releasing closed captioning and transcripts at the same time as the video or audio recording is required when you have a formal request. In general, you should work ahead to get captioning and transcripts made so all of your students can easily watch, listen, or read the information.
Print this resource (Moodle book)
This learning tool is known as a Moodle book. You can navigate via the arrows located at the top or bottom of the pages or from the Table of Contents. It is similar to a slideshow. You can print this book by going to the upper right corner of this page, click on the gear icon and select Print Book (all pages) or Print Chapter. Books can contain links to websites and documents, videos and images.
Example of Print Book function as described above.

Video and Closed Captions
Closed captioning is the text shown at the bottom of videos. It enables someone to be able to read what is being spoken in the video. With content coming from outside sources such as YouTube you may have seen the caption button in the video player controls.
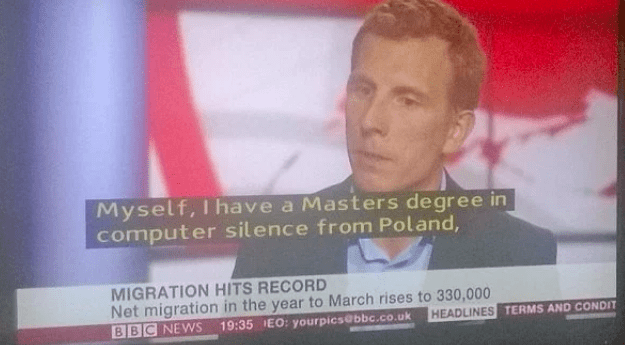
These are not always captioned to the accessibility standard for colleges because automated machine captioning does not capture every word spoken correctly. The captions need to have the same phrasing and wording when comparing it with the video's audio. There are ways to edit or correct captioning in YouTube and Kaltura.
To make sure captioning is complete and accurate for external videos you can watch the entire video with captions on. If you find any discrepancies you may need to edit your captions. If it is not your video and you do not have permission to use it, you may need to find a different video. We suggest looking for Open Educational Resources.
For instructor-created content, you will generally start with no captions. Work ahead and submit your videos to the ATC's Caption Request Form. Once a video is captioned it will have a "CC" button for students and viewers to turn on/off the closed captioning.
What is machine captioning and can I use them to meet accessibility standards?
Machine captioning is computer-generated captions done automatically on youtube videos and by manually ordering them for Kaltura videos. Machine captioning is not completely accurate and does not meet the standards for an accommodation request. It can still be really useful for the general learner. Machine captioning also gives you a great starting point to edit your own captions.

Learn about common captioning platforms next!
Kaltura (preferred platform)

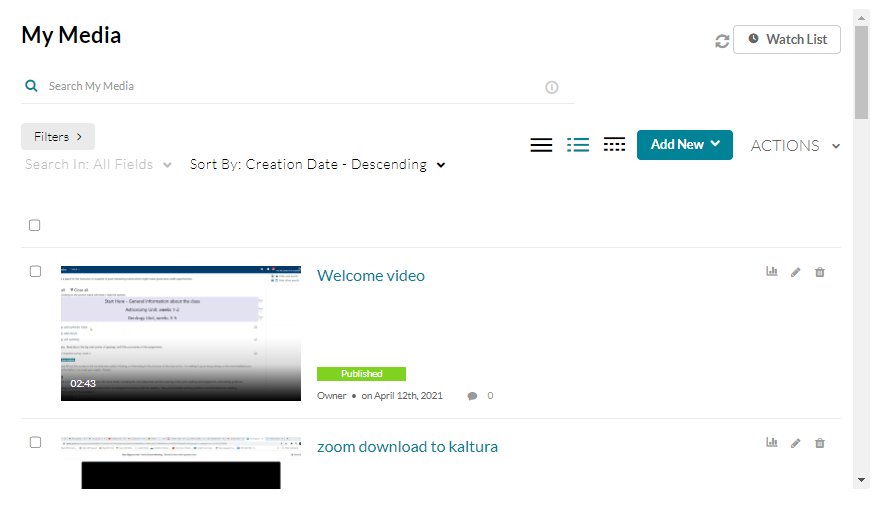
Kaltura is a video platform solution that is offered through Media Services. It is on Moodle for easy access, storage, and use of course material. As an instructor, if you have video content for your courses that you have created and it's not on another streaming service already, you can upload it to Kaltura on Moodle. From there you can reach out to ATC and they will add closed captioning through Kaltura. ATC can then give you a link or embedded link to share the closed-captioned video with your students.
To expedite the process and get captioned video in your courses follow these easy steps:
- Upload the video content directly in Moodle using Kaltura and put it in place for students.
- Notify the ATC to have your videos captioned by filling out the following Google form: Video Captioning Request Form.
When you add video content to Kaltura yourself, the video will already be in place. The captions will appear, with no extra effort on your part, once the caption request is submitted.
Youtube
Since YouTube is a video-sharing website at its core, individuals with an account can upload royalty-free videos for streaming to the public for free. This makes it a useful tool for teachers that use media as a part of their classroom instruction. The following steps take you step-by-step to add closed captioning to your video content. Before you begin, you must either have a formatted video ready to import to YouTube, or content already on YouTube ready to be shared.
Generating automatic captions on a new video
Automatically generated captions or machine captioning is a great starting place to begin editing for complete and accurate captions. By default, Youtube generates these captions for the user. Be sure to select your video's language when first uploading your video and then return in a few days to watch and correct captioning!
Adding captions to a video
- Sign in to YouTube Studio.
- From the left menu, select Subtitles.
- Click the video that you'd like to edit.
- Click ADD LANGUAGE and select your language.
- Under subtitles, click ADD.
Here is the full article on adding captions to a youtube video.
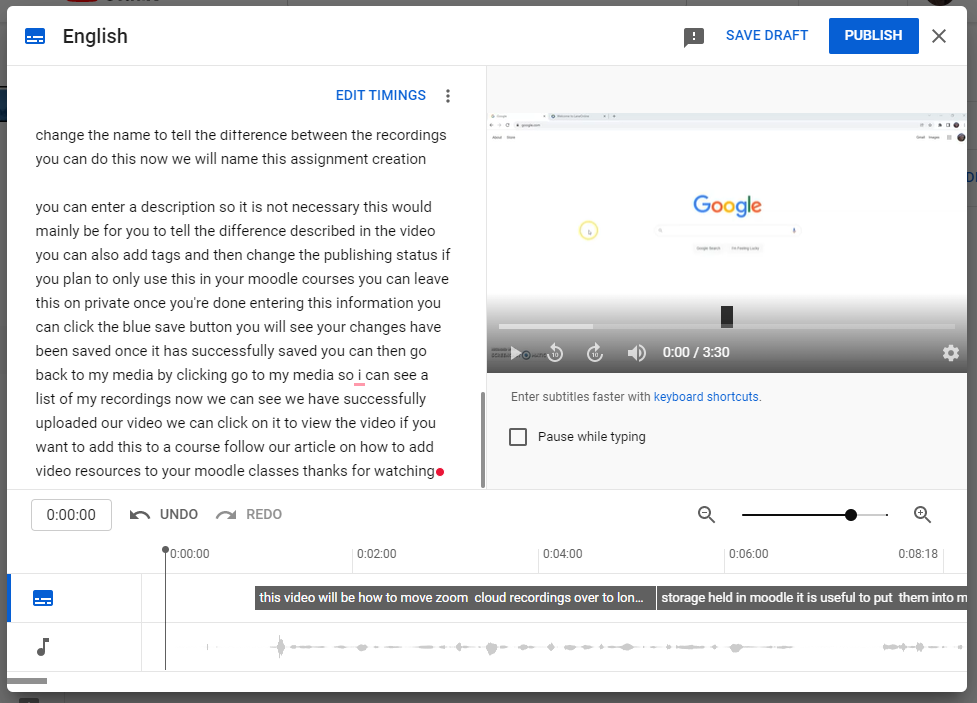
Reviewing and editing automatic captions on an existing video.
Here's how you can review automatic captions and make changes if needed:
- Sign in to YouTube Studio.
- From the left menu, select Subtitles.
- Click on the video you want to add captions or subtitles to.
- Under “Subtitles”, click More
next to the subtitles you want to edit.
- Review automatic captions and edit or remove any parts that haven't been properly transcribed

Here is the full article on reviewing and editing automatic captions on an existing video.
If you want to use videos already on YouTube that are NOT your own personal videos, you can enable closed captioning by moving your mouse icon over the lower right side of the screen and click the CC icon next to the settings icon if available.
Note: On video content that you do not own, the closed captions may only be machine captioning and will not meet accessibility standards. These captions also cannot be edited by anyone but the owner. Check the accuracy by watching and verifying the captions. If the captions are not accurate try to find a different source. If you need help finding accessible content reach out to ATC for help in finding OER content.
Audio and Transcripts
What is a transcript?
Audio Recordings
Zoom
Zoom now has a few different features to improve the accessibility of a live zoom class meeting and the Zoom app itself. Some of these features include (see links to find out how to use these features):
- Video options such as Multi-spotlight, multi-pinning, and re-arranging the gallery view.
- Accessibility settings, keyboard accessibility, and screen reader support.
- Assigning a participant to type captions live (This is more compliant than an automatic live transcript and will be provided by CAR when an accommodation requires it.)
- Find out how to use Zoom's automatic live transcription (Can be used by anyone to improve the accessibility of a meeting but will not meet the standards required for some accommodations.)
Zoom's automatic live transcript is not always accurate or complete. If you have an accommodation request reach out to CAR (Center for Accessible Resources) to see if you need any other accommodation for your live classes on Zoom.
View the full article on accessibility for Zoom to see how to use the first two features listed above.Zoom Recordings and Transcripts
Zoom's transcripts are computer-generated. These will not meet accessibility standards but can still be useful to learners and are great starting points if you want to edit your own captions. If there is an accommodation request though, reach out to the ATC using their caption request form.
When you remove a video or audio recording from zoom the transcript will no longer be attached to the recording. If you plan to use the video or audio for future classes, add your video to Moodle through Kaltura and you can then order machine captioning/transcription for the video immediately after uploading. Finally, moving your zoom recordings to Kaltura also expedites the process of captioning when paid captioning is needed.